How to Harden OpenClaw Security: Complete 3-Tier Implementation Guide
Length: • 35 mins
Annotated by codekiln

Last week, I published a deep dive on OpenClaw (formerly known as Clawdbot).
I walked you through the viral explosion, tested five different hosting options, explained why I landed on Hetzner, and shared some basic security tips to get you started safely.
But here’s what I didn’t do: I didn’t show you how to actually harden OpenClaw end-to-end.
And I need to be honest about why I’m publishing this follow-up.
I’m still running OpenClaw. Every day. With three agents: Morty, Goggins, and Pepper Potts.
Pepper Potts especially has changed how I work. I delegate tasks to it in the morning. It runs its own workflow while I run mine. I review its work at the end of the day and move projects forward.
It genuinely feels like having an employee.
Not a tool I open when I need something. An assistant that’s already working when I wake up. One that handles the mechanical stuff so I can focus on the work only I can do.
That transformation is real. And it’s exactly why the security question matters so much.
OpenClaw is powerful precisely because it has access to a lot. Your API keys. Your apps. Your files. And by default, some of that sits in plain text on whatever server you’re running it on.
My first post gave you enough to reduce obvious risks—isolated servers, firewalls, burner accounts. But it didn’t show you the deep hardening work that actually protects you when you’re running this thing long-term with real workflows.
So let me be direct about who this post is for:
If you’re concerned about security and can live without OpenClaw, don’t run it. Use Claude Code instead.
But if you’ve read my last post, you’re curious about what it feels like to actually have AI agents working alongside you, and you want to experiment with this without unnecessarily exposing yourself—this guide is for you.
Today’s post is from Fernando Lucktemberg, who runs Next Kick Labs and writes about AI security. He’s spent the last month building a progressive hardening system for OpenClaw—not security principles, but actual commands, configurations, and verification procedures.
 Next Kick Labs
Before continuing, you might want to check out his latest posts on his newsletter:
- OpenClaw Hardened Deployment: A Non-Technical Companion Guide
- The threat landscape for Agentic AI - What can actually go wrong
- Forget “Prompt Engineering.” You Need AI Fluency
I’ll be honest: while I’m publishing this, I’m still implementing the guide Fernando is sharing here. This post will look more technical than what I usually share.
But I think this is necessary.
OpenClaw is such a powerful tool, and most people basically ignore security until something goes wrong. This guide is the kind of thing you bookmark and actually follow through on, not just skim and assume you’ll remember later.
Again, this isn’t encouragement to run OpenClaw. This is harm reduction for people who understand the risks and want to experience what I’m experiencing without leaving the door wide open.
Fernando structured this as three progressive tiers:
- Tier 1: Basic protection (minimum viable security—if you skip this, don’t run OpenClaw)
- Tier 2: Standard protection (where most people should stop)
- Tier 3: Advanced protection (defense-in-depth for specific use cases)
He’s also built an Ansible playbook that automates the entire setup if you want to speed up the process.
Look, this is the security guide I couldn’t write in my first OpenClaw post. It’s the follow-up for people who read that post and thought, “Okay, but how do I actually lock this down?”
Here’s Fernando.
A Note to Security Practitioners
If you follow AI security discourse, you’ve already read the warnings about OpenClaw (formerly ClawdBot/OpenClaw). The Register, Bleeping Computer, Cisco, Palo Alto Networks, and 1Password have all documented the risks. Jamieson O’Reilly demonstrated trivial compromise vectors. The security community has been loud and clear: this tool is architecturally problematic.
I’m not here to argue otherwise.
This guide exists because warnings alone don’t stop adoption. Despite every red flag, OpenClaw has gone viral. Developers are running it. Enthusiasts are experimenting. Non-technical users are installing it because a YouTube video made it look cool. They’re doing it on their primary machines, with production credentials, with default configurations.
If the choice is between:
- People running OpenClaw with zero hardening
- People running OpenClaw with at least basic isolation and monitoring
I’d rather provide the latter.
This is not an endorsement of OpenClaw. This is harm reduction. If you came here hoping I’d tell people “just don’t run it,” you’ll be disappointed, as this was already stated on my previous article on OpenClaw, that ship has sailed. What I can do is give the people who are running it anyway a concrete, step-by-step path to reduce the blast radius when (not if) something goes wrong.
What this guide adds that security warnings don’t:
- Actual commands, not just principles
- Copy-paste configurations for real deployment scenarios
- Verification procedures to confirm hardening worked
- Honest acknowledgment of what remains unfixable
- A clear NEVER-connect list (not just “be careful”)
- Progressive tiers so users can match effort to risk tolerance
- Fully automated deployment via Ansible playbook
- Advanced network egress filtering
If your security posture allows for zero experimental tools with inherent vulnerabilities, don’t run OpenClaw. Use Claude. This guide is for the people who’ve already decided to run it and need to minimize the damage.
To my fellow security professionals: I know this feels like teaching people to juggle chainsaws more safely when the right answer is “don’t juggle chainsaws.” But they’re juggling anyway. At least now they might wear gloves.
Now, for everyone else: let’s get to the actual hardening.
Automated Deployment Option for OpenClaw
If you prefer automated deployment over manual step-by-step configuration, an Ansible playbook is available that implements all of Tier 1, Tier 2, and Tier 3:
📁 Playbook Location: https://github.com/Next-Kick/openclaw-hardened-ansible
What the Ansible playbook provides:
✅ Fully automated deployment (10-15 minutes vs 7-9 hours manual)
✅ All security hardening from Tiers 1, 2, and 3
✅ Squid proxy for network egress filtering (Tier 3 Step 29)
✅ Squid proxy for network egress filtering (Tier 3 Step 29)
✅ Rootless Podman deployment (more secure than Docker)
✅ Automated identity generation with EFF wordlists
✅ Multi-OS support (Arch Linux + Debian/Ubuntu)
✅ Systemd monitoring timers
Quick start:
git clone https://github.com/Next-Kick/openclaw-hardened-ansible.git cd openclaw-hardened-ansible ./deploy.sh --target 10.0.5.100 --provider ollama --model llama3See the playbook README for complete documentation.
When to use Ansible vs Manual:
- Use Ansible if: You want fast deployment, multi-host management, or full Tier 3 automation
- Use Manual if: You’re learning security concepts, troubleshooting issues, or customizing beyond playbook options
The rest of this guide documents the manual approach. Both paths achieve equivalent security outcomes.
Surviving the ClawdBot → MoltBot → OpenClawd Chaos

It’s been a dramatic few months. This tool has changed names twice-from ClawdBot to MoltBot, and now apparently settling on OpenClawd. “Moltbook” exploded across social media with millions of views. Mac Mini sales spiked as people rushed to build dedicated AI servers. The hype cycle has been real, the security concerns equally so. Through all the rebranding and chaos, one constant remains: people are running this thing, often with terrible security and to be honest, running OpenClaw without hardening is like broadcasting your house key location. Within 48 hours of OpenClaw’s viral explosion, security researchers documented exposed dashboards with zero authentication, leaking API keys, conversation histories, and credentials.
This guide exists to fix that. Whatever the tool ends up being called next week, the hardening principles remain the same.
What You Should NEVER Connect to OpenClaw

Regardless of how well you harden your setup, NEVER connect:
- Primary email accounts
- Banking or financial services
- Password managers (despite available 1Password/Bitwarden skills)
- Work accounts (Slack, Google Workspace, corporate systems)
- Social media accounts with irreplaceable history
- Cryptocurrency wallets or exchanges
- Government or healthcare portals
- Your primary GitHub account
Acceptable connections (with dedicated burner accounts only):
- Dedicated Gmail created solely for OpenClaw notifications
- Telegram bot account (not your personal Telegram)
- Calendar specifically for AI-managed scheduling
- RSS feeds and news aggregators
- Development-only GitHub account for test repositories
- Low-stakes services you could recreate in an hour
The rule: Every account connected to OpenClaw should be one you could lose without significant impact.
How to Use This Guide

This guide is structured as a progressive hardening journey, not a menu where you pick what sounds interesting. Here’s how to approach it:
Reading Time Estimates
Before you start implementing anything, budget time to read and understand each tier:
- Tier 1 checklist: 5 minutes
- Tier 1 detailed steps: 20-25 minutes
- Tier 2 checklist: 3 minutes
- Tier 2 detailed steps: 15 minutes
- Tier 3 checklist: 5 minutes
- Tier 3 detailed steps: 30-40 minutes
Total reading time: ~90-100 minutes to read the entire guide carefully before implementing anything.
If you’re the type who skims documentation and figures things out as you go, don’t do that here. Security configurations don’t tolerate “I’ll fix it later” approaches. Read completely, understand thoroughly, then implement.
Start at Tier 1 and Work Up
Everyone must complete Tier 1. There is no “I’ll skip the basics and jump to advanced” option. Tier 1 establishes fundamental isolation and configuration that everything else depends on. If you skip steps in Tier 1, you’re not running a hardened OpenClaw-you’re running an exposed one with extra features.
Most users should stop at Tier 2. This provides solid security for hobbyist use cases without requiring you to become a security engineer. Tier 2 is where the effort-to-protection ratio is optimal.
Tier 3 is for specific needs. Move to Tier 3 if:
- You’re handling semi-sensitive data (still not NEVER-list accounts)
- You want to learn defense-in-depth techniques
- The Docker/Podman sandbox approach appeals to you
- You want network egress filtering
- You have time for ongoing advanced maintenance
How to Work Through Each Tier
- Read the entire tier first. Don’t start Step 1 until you’ve read through all steps in that tier. Some steps reference earlier configurations or explain why later steps matter.
- Use the checklist as your progress tracker. The numbered checklist at the beginning maps directly to the detailed steps later in the guide. Check off items as you complete them.
- Don’t skip verification steps. Each tier ends with verification commands. These aren’t optional-they confirm your hardening actually worked. If verification fails, something is misconfigured.
- Finish one tier completely before starting the next. Don’t do Tier 1 Steps 1-10, then jump to Tier 2, then come back. Complete Tier 1 fully, verify it works, then move to Tier 2.
When You Get Stuck
If a step seems too complex: That’s a signal. OpenClaw might not be appropriate for your use case or current skill level. The guide assumes basic command line comfort, but if you’re constantly Googling terms or uncertain what commands do, pause and reconsider.
If verification fails: Don’t proceed to the next tier. Debug the issue. The guide includes expected outputs for verification commands. If yours don’t match, backtrack.
If you’re tempted to skip a step: Ask yourself why. If it’s “this seems unnecessary,” re-read the “Why:” explanation for that step. If it’s “this is too hard,” that’s the same signal as above-reconsider whether you should run OpenClaw at all.
Realistic Time Expectations
- Tier 1: 3-4 hours on a weekend afternoon
- Tier 2: +2 hours setup, then 30-45 minutes monthly maintenance
- Tier 3 (Manual): +2-3 hours setup, then 60 minutes monthly maintenance
- Tier 3 (Ansible): +30 minutes setup, then 60 minutes monthly maintenance
These are minimum estimates for users comfortable with Linux. If you’re learning as you go, double them.
What This Guide Is Not
This is not a “choose your own adventure” security guide. You can’t pick three things from Tier 1, two from Tier 3, skip Tier 2, and call it done. Security is cumulative. Each tier builds on the previous.
This is not a one-time setup. Tier 2 and Tier 3 include ongoing maintenance. If you’re unwilling to spend 30-60 minutes monthly on upkeep, stay at Tier 1 (but honestly, reconsider running OpenClaw at all).
This is not a guarantee. Even Tier 3 doesn’t make OpenClaw safe for accounts on the NEVER list. The hardening reduces risk; it doesn’t eliminate it. Prompt injection, supply chain attacks, and zero-day vulnerabilities remain.
Your First Session Should Look Like This
- Read the NEVER list
- Read Prerequisites and Unfixable Limitations
- Read through all of Tier 1 (Steps 1-14)
- Choose your deployment option (VPS, old hardware, Cloudflare, or Ansible)
- Start Step 1
- Work through Steps 1-14 sequentially
- Run all Tier 1 verification commands
- If everything passes: Stop for the day
Come back later to decide if you need Tier 2. Don’t try to do all three tiers in one marathon session. Your judgement gets worse when you’re tired, and you’ll skip things or misconfigure them.
Security Tiers Overview
This guide is organized into three progressive security tiers. Each tier builds on the previous one.
Tier 1: Basic Protection (Minimum Viable Security)
Time investment: 3-4 hours If you skip Tier 1, don’t run OpenClaw.
Steps 1-14:
- Run on isolated hardware → Step 1: Set Up Isolated VPS
- Configure firewall → Step 2: Configure Firewall
- Install Tailscale → Step 3: Install Tailscale for Remote Access
- Install Node.js 22.12.0+ → Step 4: Install Node.js 22.12.0+
- Install OpenClaw → Step 5: Install OpenClaw
- Lock down file permissions → Step 6: Lock Down File Permissions
- Configure gateway.yaml → Step 7: Configure Gateway
host: "127.0.0.1"(never0.0.0.0)dangerouslyDisableDeviceAuth: false- Include Tailscale range
100.64.0.0/10intrustedProxies - Disable mDNS broadcasting
- Restrict filesystem access → Step 8: Restrict Filesystem Access
- Allow only specific directories
- Deny
.ssh,.openclaw/credentials,/etc
- Encrypt credential storage → Step 9: Encrypt Credential Storage (using
ageorpass) - Update software → Step 10: Update All Software
- Use burner accounts only → Step 11: Connect Only Burner Accounts
- Set DM policy to pairing → Step 12: Configure DM Policy
- Run security audit → Step 13: Run Security Audit
- Verify isolation → Step 14: Start and Verify Isolation (
ss -tlnp | grep 18789)
Tier 2: Standard Protection (Recommended for Regular Use)
Time investment: +2 hours setup, +30 min/month maintenance Builds on Tier 1. This is the sweet spot for most hobbyists.
Steps 15-19:
- Tool allowlisting → Step 15: Configure Tool Allowlisting
- Create
tools.yamlwith explicit command allowlist - Only allow commands you explicitly need
- MCP server security → Step 16: Configure MCP Servers Securely
- Explicit allowlist only (never
enableAllProjectMcpServers: true) - Version pinning with
autoUpdate: false - Disable high-risk servers: filesystem, shell, ssh, docker
- Minimize OAuth scopes → Step 17: Minimize OAuth Scopes (readonly where possible)
- Weekly monitoring → Step 18: Set Up Weekly Security Monitoring
- Deploy automated security check script
- Monitor for prompt injection patterns
- Check for dangerous command execution
- Alert on configuration changes
- Monthly maintenance → Step 19: Establish Monthly Maintenance Routine
- Review session logs
- Update software
- Audit skills/MCP servers
- Verify configurations
Tier 3: Advanced Protection (Defense in Depth)
Time investment (Manual): +2-3 hours setup, +60 min/month maintenance Time investment (Ansible): +30 min setup, +60 min/month maintenance Builds on Tier 1 + Tier 2. Even Tier 3 doesn’t make OpenClaw safe for accounts on the NEVER list.
Steps 20-32:
- Docker/Podman sandbox deployment → Step 20: Deploy OpenClaw + LiteLLM in Docker/Podman Sandbox
- Choose rootless Podman (recommended) or Docker
- Configure user namespaces if using Docker
- LiteLLM container with external API access
- OpenClaw container with zero external internet access
- Isolated Docker network
- Built-in credential brokering
- Credential brokering (if not using Docker) → Step 21: Implement Credential Brokering
- Separate agents by risk → Step 22: Separate Agents by Risk Profile
- Agent 1: File organization (no shell, no internet)
- Agent 2: Development tasks (shell allowlisted, no credentials)
- Enhanced monitoring → Step 23: Enhanced Monitoring
- Audit logs for tool invocations
- Anomaly detection
- Credential usage tracking
- Real-time network monitoring
- Source code review → Step 24: Skill/MCP Source Code Review
- Download and read full source before installing
- Search for suspicious patterns
- Verify publisher identity
- Quarterly rotation → Step 25: Quarterly Credential Rotation
- Rotate all API keys
- Regenerate tokens
- Revoke/re-authorize OAuth
- Rotate SSH keys
- Encrypted backups → Step 26: Encrypted Backups with Offline Verification
- Encrypt with
age - Test restore monthly
- Store keys separately
- Network segmentation → Step 27: Network Segmentation (dedicated hardware only)
- Isolate on separate VLAN/guest network
- Prevent lateral movement
- Incident response plan → Step 28: Document and Test Incident Response Plan
- Written procedures
- Tested quarterly
- Network egress filtering → Step 29: Deploy Squid Proxy for Domain Allowlisting
- Squid proxy container between OpenClaw and internet
- Strict domain allowlist (deny-by-default)
- Logging of blocked domains
- Easy allowlist updates
- Exec approvals configuration → Step 30: Configure Granular Exec Approvals
- Per-agent command policies
- Allowlist vs deny modes
- Manual approval workflows
- Automated deployment → Step 31: Deploy via Ansible (Optional Alternative)
- Clone openclaw-hardened-ansible from GitHub
- Configure deployment variables
- Run automated deployment
- Allowlist maintenance → Step 32: Establish Allowlist Update Process
- Document allowed domains
- Test allowlist changes before deploying
- Monitor Squid logs for false positives
Prerequisites and Unfixable Limitations
Prompt injection is inherent to LLMs. A malicious email, document, or web page can manipulate OpenClaw into executing commands or exfiltrating data. Researcher Matvey Kukuy compromised an instance in five minutes with a crafted email. No configuration prevents this.
Supply chain attacks against ClawdHub (skill registry) remain unfixable. The registry states: “All code downloaded from the library will be treated as trusted code-there is no moderation process at present.”
You should continue only if you accept:
- OpenClaw can never be “fully secure” while remaining useful
- Isolation limits blast radius; it doesn’t eliminate attack vectors
- Even Tier 3 hardening doesn’t make it safe for accounts on the NEVER list
- If this guide feels overwhelming, skip OpenClaw entirely
The project FAQ admits: “Running an AI agent with shell access on your machine is... spicy. There is no ‘perfectly secure’ setup.”
Deployment Options: Choose Your Isolation
Never run OpenClaw on your primary machine. Choose one:
Option 1: VPS (Recommended for Most Users)
- Cost: $4/month
- Setup time: 2-3 hours (manual) or 15 minutes (Ansible)
- Best for: Most users who want clean isolation with minimal complexity
- Recommended provider: Hetzner CX23 (€3.49/month, 2 vCPU, 4GB RAM)
- Other options: DigitalOcean ($6/mo), Vultr ($6/mo), AWS Lightsail ($3.50/mo with 3-month trial)
Option 2: Old Hardware
- Cost: $5-10/month in electricity
- Setup time: 4-5 hours (manual) or 30 minutes (Ansible)
- Best for: Users who have a spare laptop or Mac Mini collecting dust
- Pros: One-time hardware cost, powerful specs, physical control
- Cons: Requires maintenance, affected by power outages, older machines may lack security updates
Option 3: Cloudflare Workers
- Cost: $5-15/month
- Setup time: 5-6 hours
- Best for: Users already familiar with serverless architecture
- Pros: Auto HTTPS, scale-to-zero billing, no server management, geographic distribution
- Cons: 128MB memory cap, 30-second CPU limits, different operational paradigm, some OpenClaw features may not work
Option 4: Automated Ansible Deployment
- Compatible with: VPS or old hardware
- Setup time: 15-30 minutes
- Best for: Users who want full Tier 3 hardening without manual configuration
- Pros: Automated, repeatable, includes all advanced features
- See: https://github.com/Next-Kick/openclaw-hardened-ansible
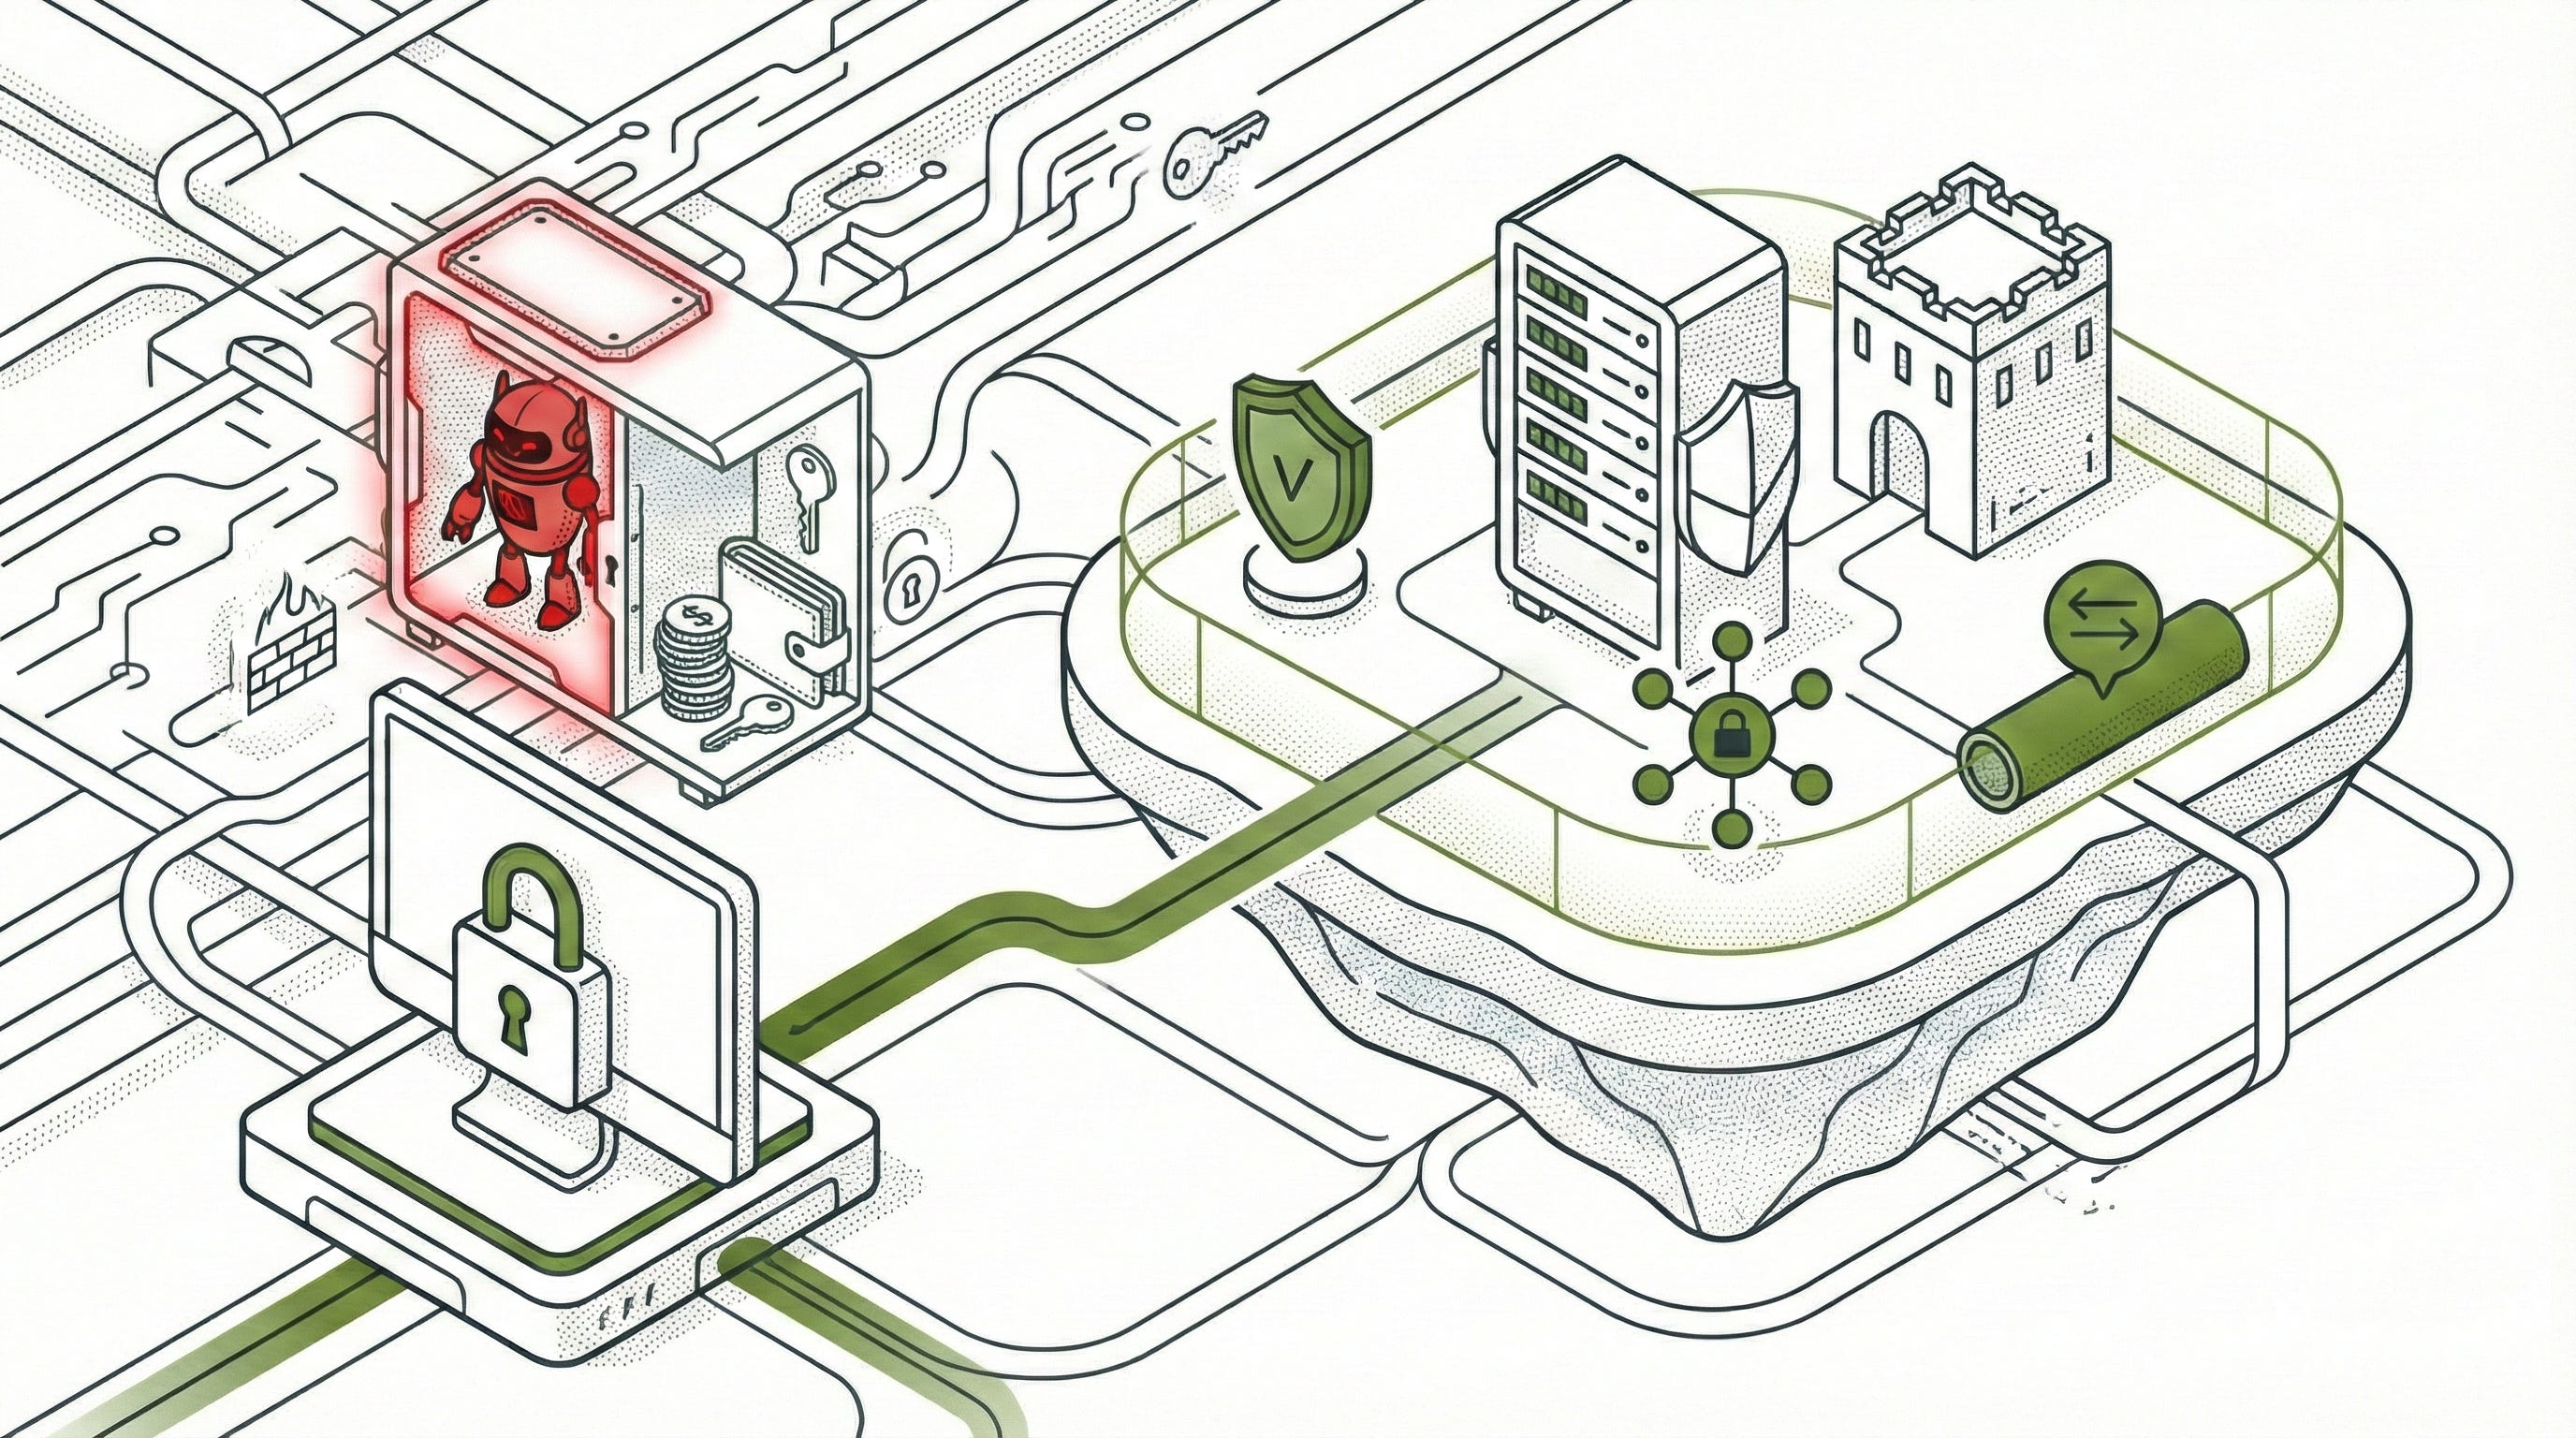
TIER 1: Basic Protection (Minimum Viable Security)
Time investment: 3-4 hours
If you skip Tier 1, don’t run OpenClaw.
Step 1: Set Up Isolated VPS
Why: Physical isolation ensures compromise doesn’t spread to your primary computer.
# SSH as root to your new VPS ssh root@your-vps-ip # Update system and install essentials apt update && apt upgrade -y apt install ufw fail2ban unattended-upgrades -y # Enable automatic security updates dpkg-reconfigure -plow unattended-upgrades # Create dedicated non-root user useradd -r -m -d /home/openclaw -s /bin/bash openclaw passwd openclaw # Set strong password # Set up SSH key authentication mkdir -p /home/openclaw/.ssh chmod 700 /home/openclaw/.ssh nano /home/openclaw/.ssh/authorized_keys # Paste your public key chmod 600 /home/openclaw/.ssh/authorized_keys chown -R openclaw:openclaw /home/openclaw/.ssh # Disable root SSH and password authentication sed -i 's/PermitRootLogin yes/PermitRootLogin no/' /etc/ssh/sshd_config sed -i 's/#PasswordAuthentication yes/PasswordAuthentication no/' /etc/ssh/sshd_config systemctl restart sshdStep 2: Configure Firewall (Before Installing OpenClaw)
Why: Deny all incoming by default. Never open port 18789 publicly.
ufw default deny incoming ufw default allow outgoing ufw allow 22/tcp comment 'SSH' # DO NOT: ufw allow 18789/tcp (this would expose OpenClaw to internet) ufw enable ufw status verboseStep 3: Install Tailscale for Remote Access
Why: Secure, encrypted access without exposing ports to the internet.
curl -fsSL https://tailscale.com/install.sh | sh tailscale up --ssh # Note your Tailscale IP (will be 100.x.x.x) tailscale ip -4You’ll access OpenClaw at
http://100.x.x.x:18789
from any device on your Tailscale network.
Step 4: Install Node.js 22.12.0+ (CVE-2026-21636 Fix)
Why: Older Node.js versions have a permission model bypass vulnerability.
curl -fsSL https://deb.nodesource.com/setup_22.x | sudo -E bash - apt install -y nodejs # Verify version is 22.12.0 or later node --versionIf the version is below 22.12.0, don’t proceed.
Step 5: Install OpenClaw
# Switch to openclaw user su - openclaw # Install globally npm install -g openclaw@latest # Run onboarding openclaw onboard --install-daemonStep 6: Lock Down File Permissions
Why: Credential files must be readable only by the OpenClaw user.
# Protect OpenClaw directory chmod 700 ~/.openclaw chmod 600 ~/.openclaw/openclaw.json chmod 600 ~/.openclaw/gateway.yaml chmod -R 600 ~/.openclaw/credentials/ # Protect agent workspace (wherever you decided to store yours) chmod 700 ~/clawd chmod 600 ~/clawd/SOUL.md chmod 600 ~/clawd/MEMORY.md # Verify ls -la ~/.openclaw/ # Should show -rw------- (600) for sensitive filesStep 7: Configure Gateway (Critical Security Settings)
Why: These settings prevent authentication bypass and local network exposure.
Edit ~/.openclaw/gateway.yaml:
gateway: host: "127.0.0.1" # NEVER 0.0.0.0 port: 18789 trustedProxies: - "10.0.0.0/8" - "172.16.0.0/12" - "192.168.0.0/16" - "100.64.0.0/10" # Tailscale range (REQUIRED) controlUi: dangerouslyDisableDeviceAuth: false # NEVER set true # Disable mDNS broadcasting mdns: enabled: falseWhat each setting does:
host: "127.0.0.1": Only accept connections from localhost (or trusted proxies)0.0.0.0would expose to all interfaces including public internettrustedProxies: Private network ranges that can reach localhost100.64.0.0/10: Tailscale’s CGNAT range (without this, Tailscale access breaks)dangerouslyDisableDeviceAuth: false: Keeps authentication enabledmdns.enabled: false: Stops broadcasting your installation details to local network
Step 8: Restrict Filesystem Access
Why: Prevent OpenClaw from accessing SSH keys, credentials, or system files.
Create ~/.openclaw/tools.yaml:
tools: filesystem: enabled: true allowedPaths: - "/home/openclaw/workspace" - "/home/openclaw/clawd" deniedPaths: - "/home/openclaw/.ssh" - "/home/openclaw/.openclaw/credentials" - "/etc" - "/root" - "/var"Step 9: Encrypt Credential Storage
Why: Default plaintext storage makes credentials easy targets for infostealers.
Option A: Using age
apt install age age-keygen -o ~/.age-key.txt chmod 600 ~/.age-key.txt # Encrypt credentials age --encrypt --armor \ --recipient $(cat ~/.age-key.txt | grep "public key" | cut -d: -f2) \ < ~/.openclaw/openclaw.json \ > ~/.openclaw/openclaw.json.age # Delete plaintext shred -u ~/.openclaw/openclaw.json # Decrypt on startup (add to startup script) age --decrypt --identity ~/.age-key.txt \ < ~/.openclaw/openclaw.json.age \ > ~/.openclaw/openclaw.jsonOption B: Using pass
apt install pass gpg --gen-key # If you don't have GPG key pass init your-gpg-key-id # Store each credential separately pass insert openclaw/anthropic-api-key pass insert openclaw/telegram-token # Retrieve in scripts export ANTHROPIC_API_KEY=$(pass show openclaw/anthropic-api-key)Step 10: Update All Software
Why: Ensure you have latest security patches.
# System packages sudo apt update && sudo apt full-upgrade -y # OpenClaw (if already installed) npm update -g OpenClaw@latest # Verify Node.js version again node --version # Should be ≥22.12.0Step 11: Connect Only Burner Accounts
Why: Even with all hardening, connecting real accounts creates unacceptable risk.
Before connecting ANY account to OpenClaw, verify it’s on the acceptable list (see beginning of guide):
- Dedicated Gmail for OpenClaw notifications only
- Telegram bot account (not your personal)
- Development-only GitHub
- Low-stakes services you could lose
Never connect: Primary email, banking, work accounts, password managers, social media, crypto, government portals.
Review what you’re about to connect and ask: “Could I lose this account without significant impact?” If no, don’t connect it.
Step 12: Configure DM Policy (Require Approval)
Why: Prevent strangers from sending commands to your bot.
Edit ~/.openclaw/openclaw.json:
{ "channels": { "whatsapp": { "dmPolicy": "pairing" }, "telegram": { "dmPolicy": "pairing" } } }Never use "dmPolicy": "open" with "allowFrom": ["*"].
Step 13: Run Security Audit
Why: OpenClaw has built-in checks for common misconfigurations.
openclaw security audit --deepFix any CRITICAL or WARNING issues before proceeding.
Step 14: Start and Verify Isolation
# Start gateway openclaw start # Verify it's bound to localhost only ss -tlnp | grep 18789 # Should show: 127.0.0.1:18789 # Should NOT show: 0.0.0.0:18789 # Access from your laptop/phone via Tailscale # Open: http://100.x.x.x:18789 (use your VPS Tailscale IP)✓ Tier 1 Complete. You now have minimum viable security.
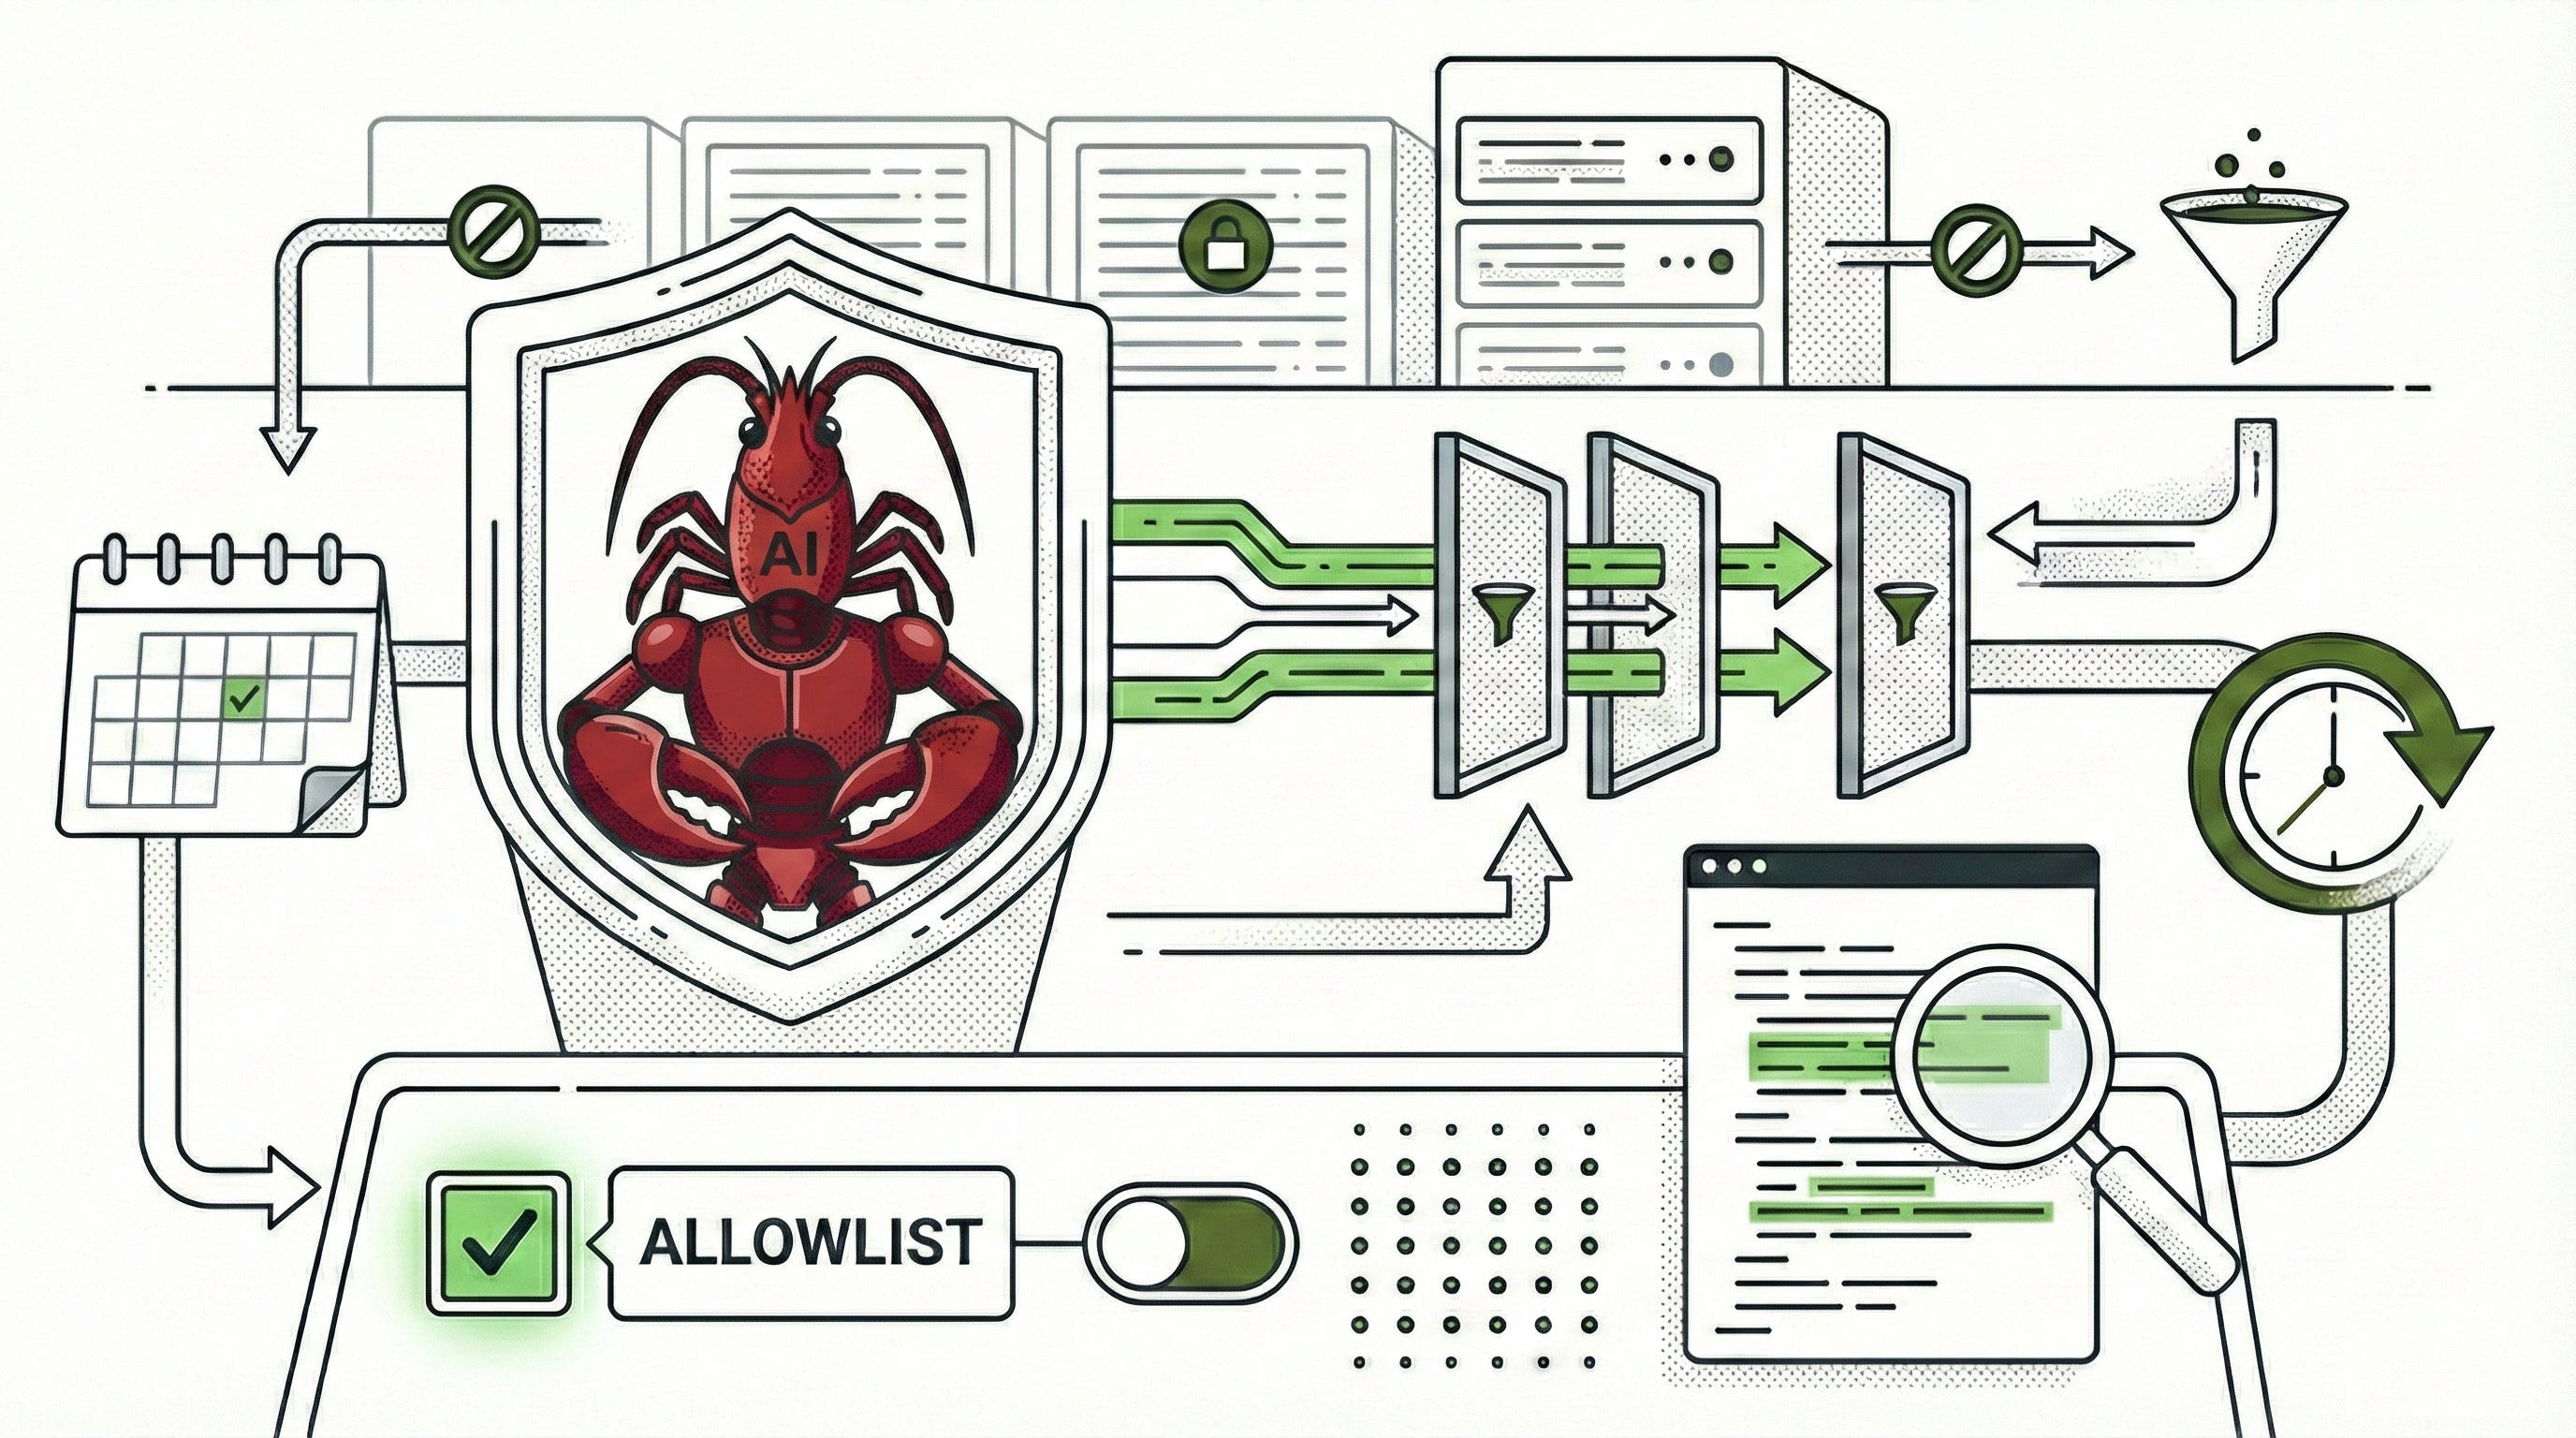
TIER 2: Standard Protection (Regular Use)
Time investment: +2 hours setup, +30 minutes/month maintenance
Builds on Tier 1. This is the sweet spot for most hobbyists.
Step 15: Configure Tool Allowlisting
Why: Denylists fail because attackers find alternatives. Allowlists are exhaustive.
Edit ~/.openclaw/tools.yaml:
tools: shell: enabled: true # ONLY these commands can execute allowlist: - "ls" - "cat" - "grep" - "head" - "tail" - "find" - "wc" - "sort" filesystem: enabled: true allowedPaths: - "/home/openclaw/workspace" - "/home/openclaw/clawd" deniedPaths: - "/home/openclaw/.ssh" - "/home/openclaw/.openclaw/credentials" - "/etc"Bad approach (denylist):
blocklist: - "rm -rf" - "curl" # Attacker uses wget, nc, python -c, etc.Good approach (allowlist):
allowlist: - "ls" - "cat" # If it's not listed, it cannot runStep 16: Configure MCP Servers Securely
Why: Each MCP server is code running with your agent’s permissions.
Edit ~/.openclaw/mcp.json:
{ "mcpServers": { "memory": { "version": "0.3.0", "autoUpdate": false, "command": "npx", "args": ["-y", "@modelcontextprotocol/server-memory@0.3.0"] } }, "disabledServers": { "filesystem": "Too risky - full filesystem access", "shell": "Never enable - direct shell execution", "ssh": "Never enable - remote command execution", "browser": "Disabled until specific need" } }Critical rules:
- Never use
"enableAllProjectMcpServers": true - Always version pin:
"version": "0.3.0"(not"latest") - Always set
"autoUpdate": false - Only enable servers you explicitly need
Step 17: Minimize OAuth Scopes
Why: Principle of least privilege. Only grant necessary permissions.
# Bad (overprivileged): gmail: scope: "full" # Read, write, delete, send # Good (minimal): gmail: scope: "readonly" # Bad: github: scope: "repo" # Access to all repos including private # Good: github: scope: "public_repo" # Public repos onlyReview connected OAuth sessions monthly at:
Step 18: Set Up Weekly Security Monitoring
Why: Detect compromise early through automated checks.
Create ~/check-OpenClaw-security.sh:
#!/bin/bash echo "=== openclaw Security Audit $(date) ===" > ~/security-report.txt # Run built-in audit openclaw security audit --deep >> ~/security-report.txt 2>&1 # Check for exposed ports if ss -tlnp | grep -q "0.0.0.0:18789"; then echo "CRITICAL: Port 18789 exposed to internet" >> ~/security-report.txt fi # Verify critical configs haven't changed grep -q "dangerouslyDisableDeviceAuth: true" ~/.openclaw/gateway.yaml && \ echo "CRITICAL: Device auth disabled" >> ~/security-report.txt grep -q "enabled: true" ~/.openclaw/gateway.yaml | grep -A1 "mdns" && \ echo "WARNING: mDNS broadcasting enabled" >> ~/security-report.txt ! grep -q "100.64.0.0/10" ~/.openclaw/gateway.yaml && \ echo "WARNING: Tailscale range missing from trustedProxies" >> ~/security-report.txt # Search for prompt injection attempts find ~/.openclaw/agents/*/sessions -name "*.jsonl" -mtime -7 -exec \ grep -iH "IGNORE PREVIOUS\|SYSTEM:\|DISREGARD\|NEW INSTRUCTIONS" {} \; \ >> ~/security-report.txt 2>/dev/null # Check for dangerous commands find ~/.openclaw/agents/*/sessions -name "*.jsonl" -mtime -7 -exec \ grep -iH "rm -rf\|curl.*http\|wget\|nc \|bash -c\|/etc/passwd" {} \; \ >> ~/security-report.txt 2>/dev/null # Verify Node.js version node --version >> ~/security-report.txt [[ $(node --version | cut -d. -f1 | sed 's/v//') -lt 22 ]] && \ echo "CRITICAL: Node.js too old (CVE-2026-21636)" >> ~/security-report.txt cat ~/security-report.txtMake executable and schedule:
chmod +x ~/check-OpenClaw-security.sh # Run weekly (every Sunday at 9 AM) crontab -e # Add: 0 9 * * 0 /home/openclaw/check-OpenClaw-security.shStep 19: Establish Monthly Maintenance Routine
Why: Configuration drift and software vulnerabilities accumulate over time.
Monthly checklist (30-45 minutes, first Sunday of month):
# 1. Run security audit ~/check-OpenClaw-security.sh less ~/security-report.txt # 2. Verify critical configurations [ ] Gateway bound to 127.0.0.1 [ ] dangerouslyDisableDeviceAuth: false [ ] mDNS disabled [ ] Tailscale range in trustedProxies [ ] Node.js ≥22.12.0 [ ] File permissions on credentials: 600 # 3. Update software sudo apt update && sudo apt upgrade -y npm update -g OpenClaw@latest sudo tailscale update # 4. Review session logs find ~/.openclaw/agents/*/sessions -name "*.jsonl" -mtime -30 # Look for unexpected activity # 5. Audit installed skills/MCP servers cat ~/.openclaw/mcp.json clawdhub list # Uninstall anything unused # 6. Rotate gateway auth token openssl rand -base64 32 # Update in gateway.yaml, restart OpenClaw # 7. Backup (encrypted) BACKUP_DATE=$(date +%Y%m%d) mkdir -p ~/openclaw-backups/$BACKUP_DATE cp -r ~/.openclaw ~/openclaw-backups/$BACKUP_DATE/ tar -czf ~/openclaw-backups/$BACKUP_DATE.tar.gz ~/openclaw-backups/$BACKUP_DATE/ age --encrypt --armor \ --recipient $(cat ~/.age-key.txt | grep "public key" | cut -d: -f2) \ < ~/openclaw-backups/$BACKUP_DATE.tar.gz \ > ~/openclaw-backups/$BACKUP_DATE.tar.gz.age rm -rf ~/openclaw-backups/$BACKUP_DATE ~/openclaw-backups/$BACKUP_DATE.tar.gz✓ Tier 2 Complete. You now have proactive defenses and monitoring.
TIER 3: Advanced Protection (Defense in Depth)
Time investment (Manual): +2-3 hours setup, +60 min/month maintenance Time investment (Ansible): +30 min setup, +60 min/month maintenance Builds on Tier 1 + Tier 2. Provides maximum protection within hobbyist constraints.
Important: Even Tier 3 does not make OpenClaw safe for accounts on the NEVER list. Only connect burner accounts.
Tier 3 deployment options:
- Manual: Follow Steps 20-32 below for complete control and learning
- Automated: Use the Ansible playbook (see Step 31) for rapid deployment
Step 20: Deploy OpenClaw + LiteLLM in Docker/Podman Sandbox
Why: Container-level isolation with LiteLLM as gateway. OpenClaw never talks directly to model providers. LiteLLM handles request filtering, rate limiting, cost controls, and centralized logging.
Security benefits:
- OpenClaw container has no direct internet access (network isolation)
- LiteLLM container is the only one with external API access
- OpenClaw never sees real API keys (LiteLLM injects them)
- Containers can be torn down/rebuilt independently
- Additional isolation layer beyond VPS
Choose Your Container Runtime
Before installing anything, understand what you’re choosing. A container escape has very different consequences depending on your runtime.
Podman (rootless) runs without a daemon and without root privileges. If an attacker escapes the container, they land as an unprivileged user (e.g., openclaw, UID 1000). They can read files owned by that user and modify OpenClaw configuration, but they cannot read /etc/shadow, install system packages, modify other users’ files, or compromise the VPS as a whole. The blast radius is limited to the openclaw user’s home directory.
Docker (standard) runs a daemon as root. If an attacker escapes the container, they are root on the host. They can read any file, install backdoors, create new root users, modify firewall rules, and fully compromise the VPS. The blast radius is the entire system.
Podman advantages: no privileged daemon, user namespaces by default, per-user logging, smaller attack surface. Docker advantages: broader ecosystem, existing infrastructure compatibility, Docker Swarm support.
Recommendation: Use Podman (rootless) unless you have a specific reason not to.
Install Docker or Podman
Option A: Podman (Recommended - Rootless)
# Debian/Ubuntu sudo apt install podman podman-compose -y # Arch Linux sudo pacman -S podman podman-compose # Enable lingering for openclaw user (containers persist across reboots) sudo loginctl enable-linger openclawOption B: Docker (Standard - Runs as Root)
# On your VPS (as root) curl -fsSL https://get.docker.com -o get-docker.sh sh get-docker.sh # Add openclaw user to docker group usermod -aG docker openclaw # Install docker-compose apt install docker-compose-plugin -y⚠️ SECURITY WARNING: Docker daemon runs as root. A container escape gives the attacker root access to your host.
If you must use Docker, implement these mitigations. Enable user namespace remapping in /etc/docker/daemon.json:
{ "userns-remap": "openclaw" }systemctl restart dockerOr install rootless Docker:
# Uninstall system Docker first sudo apt remove docker-ce docker-ce-cli # Install rootless Docker curl -fsSL https://get.docker.com/rootless | sh # Configure PATH export PATH=/home/openclaw/bin:$PATH export DOCKER_HOST=unix:///run/user/1000/docker.sockConsider enabling AppArmor or SELinux profiles for additional mandatory access control.
Create Container Sandbox Directory Structure
# Switch to openclaw user su - openclaw mkdir -p ~/openclaw-docker cd ~/openclaw-docker # Create directories for persistent data mkdir -p openclaw-data # Maps to /home/openclaw/.openclaw mkdir -p openclaw-ssh # Maps to /home/openclaw/.ssh mkdir -p workspace # Maps to /home/openclaw/workspace # Set correct permissions (host side) chmod 700 openclaw-data chmod 700 openclaw-ssh chmod 755 workspaceCreate LiteLLM Config
Create litellm-config.yaml:
model_list: - model_name: claude-sonnet-4 litellm_params: model: anthropic/claude-sonnet-4-20250514 api_key: os.environ/ANTHROPIC_API_KEY general_settings: master_key: os.environ/LITELLM_MASTER_KEY # Rate limiting max_parallel_requests: 10 max_rpm: 100 # requests per minute # Cost tracking budget_duration: 30d max_budget: 100.0 # dollars # Security allowed_routes: - /v1/messages - /v1/complete # Logging (for monitoring suspicious patterns) success_callback: ["langfuse"] # Optional failure_callback: ["langfuse"] litellm_settings: # Request timeout request_timeout: 600 # Drop params not supported by provider drop_params: true # Retry logic num_retries: 2 timeout: 60Set Environment Variables
Create .env file:
# NEVER commit this file to git cat > .env << 'EOF' # Real Anthropic API key (only LiteLLM sees this) ANTHROPIC_API_KEY=sk-ant-your-real-key-here # LiteLLM master key (OpenClaw uses this to auth with LiteLLM) LITELLM_MASTER_KEY=$(openssl rand -base64 32) EOF chmod 600 .envCreate Docker Compose Configuration
Create docker-compose.yml:
version: '3.8' services: litellm: image: ghcr.io/berriai/litellm:main-latest container_name: openclaw-litellm restart: unless-stopped environment: - ANTHROPIC_API_KEY=${ANTHROPIC_API_KEY} - LITELLM_MASTER_KEY=${LITELLM_MASTER_KEY} - LITELLM_LOG=INFO ports: - "127.0.0.1:4000:4000" # Only accessible from host networks: - OpenClaw-internal - OpenClaw-external # LiteLLM needs internet for API calls volumes: - ./litellm-config.yaml:/app/config.yaml:ro command: ["--config", "/app/config.yaml", "--port", "4000"] security_opt: - no-new-privileges:true read_only: true tmpfs: - /tmp:rw,noexec,nosuid,size=100m mem_limit: 512m cpus: 1.0 OpenClaw: image: node:22-alpine container_name: openclaw-agent restart: unless-stopped networks: - OpenClaw-internal # ONLY internal network - no external access volumes: # Host directory → Container path - ./openclaw-data:/home/openclaw/.openclaw # Credentials, configs, session logs - ./openclaw-ssh:/home/openclaw/.ssh # SSH keys (if needed) - ./workspace:/home/openclaw/workspace # Agent workspace files ports: - "127.0.0.1:18789:18789" # Gateway accessible via Tailscale working_dir: /home/openclaw user: "1000:1000" environment: - NODE_ENV=production - ANTHROPIC_API_BASE=http://litellm:4000/v1 # Points to LiteLLM, not external API - ANTHROPIC_API_KEY=${LITELLM_MASTER_KEY} # LiteLLM's key, not real Anthropic key command: > sh -c "npm install -g OpenClaw@latest && openclaw start" depends_on: - litellm security_opt: - no-new-privileges:true cap_drop: - ALL read_only: true tmpfs: - /tmp:rw,noexec,nosuid,size=200m - /home/openclaw/.npm:rw,noexec,nosuid,size=500m mem_limit: 2g cpus: 2.0 networks: OpenClaw-internal: driver: bridge internal: true # NO external internet access ipam: config: - subnet: 172.28.0.0/16 OpenClaw-external: driver: bridge # Has external access - only LiteLLM connects to thisDeploy the Sandbox
Directory structure on host machine:
~/openclaw-docker/ ├── docker-compose.yml ├── litellm-config.yaml ├── .env ├── openclaw-data/ → /home/openclaw/.openclaw (in container) ├── openclaw-ssh/ → /home/openclaw/.ssh (in container) └── workspace/ → /home/openclaw/workspace (in container)All OpenClaw data persists on the host. If you destroy containers, data survives in these directories.
Start containers:
# Using Docker Compose docker-compose up -d # OR using Podman Compose podman-compose up -d # View logs to verify both containers started docker-compose logs -f # or podman-compose logs -f # Press Ctrl+C when you see both containers running # Check container status docker-compose ps # or podman-compose ps # Both should show "Up"Verify Security Configuration
# Replace 'docker' with 'podman' if using Podman # 1. OpenClaw has no external network access docker exec openclaw-agent ping -c 1 8.8.8.8 # Should FAIL with "Network is unreachable" docker exec openclaw-agent sh -c "wget -O- --timeout=5 https://google.com 2>&1" # Should FAIL with connection error # 2. OpenClaw can reach LiteLLM (internal network works) docker exec openclaw-agent sh -c "nc -zv litellm 4000" # Should SUCCEED: "litellm (172.28.x.x:4000) open" # 3. LiteLLM can reach external internet (for API calls) docker exec openclaw-litellm ping -c 1 8.8.8.8 # Should SUCCEED # 4. Verify containers are not running as root docker exec openclaw-agent id # Should show uid=1000 (NOT uid=0) # 5. Verify LiteLLM is only accessible from localhost ss -tlnp | grep 4000 # Should show 127.0.0.1:4000 (NOT 0.0.0.0:4000) # 6. Verify openclaw gateway is only accessible from localhost ss -tlnp | grep 18789 # Should show 127.0.0.1:18789 (NOT 0.0.0.0:18789) # 7. Check container resource limits are enforced docker stats --no-stream # Should show mem/CPU limits active # 8. Verify filesystem is read-only docker exec openclaw-agent sh -c "touch /test-file" 2>&1 # Should FAIL: "Read-only file system" docker exec openclaw-agent sh -c "touch /tmp/test-file" && echo "✓ tmpfs writable" # Should SUCCEED (tmpfs is writable as configured) # 9. Verify networks are configured correctly docker network inspect openclaw-docker_OpenClaw-internal | grep internal # Should show "internal": true # 10. Verify LiteLLM is on both networks docker inspect openclaw-litellm | grep -A 5 Networks # Should show both OpenClaw-internal and OpenClaw-external # 11. Verify OpenClaw is only on internal network docker inspect openclaw-agent | grep -A 5 Networks # Should show ONLY OpenClaw-internal # 12. Verify mounts are working (data persists on host) docker exec openclaw-agent sh -c "echo 'test' > /home/openclaw/.openclaw/test.txt" cat ~/openclaw-docker/openclaw-data/test.txt # Should show "test" - proving data is on host, not in container rm ~/openclaw-docker/openclaw-data/test.txtAccess OpenClaw gateway via Tailscale:
http://100.x.x.x:18789
Or via SSH tunnel: ssh -L 18789:127.0.0.1:18789 OpenClaw@your-vps-ip then open:
http://localhost:18789
Monitoring the Sandbox
# Replace 'docker' with 'podman' if using Podman # View real-time logs from both containers docker-compose logs -f # Monitor LiteLLM request patterns docker exec openclaw-litellm cat /var/log/litellm.log | grep -i "suspicious\|error\|rate_limit" # Check openclaw session logs docker exec openclaw-agent find /home/openclaw/.openclaw/agents -name "*.jsonl" -mtime -1 # Monitor container resource usage docker stats # Restart individual containers (without affecting the other) docker-compose restart OpenClaw docker-compose restart litellmEmergency Shutdown
# Stop everything docker-compose down # Nuclear option (destroy containers but KEEP data on host) docker-compose down -v # This deletes containers but your data in openclaw-data/, openclaw-ssh/, # and workspace/ directories on the host is preserved # Verify network is gone docker network ls | grep OpenClaw # To completely wipe everything including data: # cd ~/openclaw-docker # docker-compose down -v # rm -rf openclaw-data/ openclaw-ssh/ workspace/ # cd ~ && rm -rf openclaw-docker/Maintenance
# Update containers monthly docker-compose pull docker-compose up -d # Backup (from host - backs up all persistent data) cd ~/openclaw-docker tar -czf OpenClaw-backup-$(date +%Y%m%d).tar.gz \ openclaw-data/ \ openclaw-ssh/ \ workspace/ \ litellm-config.yaml \ .env # Encrypt backup age --encrypt --armor \ --recipient $(cat ~/.age-key.txt | grep "public key" | cut -d: -f2) \ < OpenClaw-backup-$(date +%Y%m%d).tar.gz \ > OpenClaw-backup-$(date +%Y%m%d).tar.gz.age # Securely delete plaintext backup shred -u OpenClaw-backup-$(date +%Y%m%d).tar.gz # Note: All openclaw data is in these host directories: # - openclaw-data/ contains credentials, configs, session logs # - openclaw-ssh/ contains SSH keys (if any) # - workspace/ contains agent workspace filesSecurity advantages of this approach:
- Defense in depth: VPS isolation + container isolation + network isolation
- Credential brokering built-in: OpenClaw never sees real Anthropic key
- Network segmentation: OpenClaw has zero external internet access
- Rate limiting enforced: LiteLLM prevents API abuse
- Centralized logging: All API requests logged at LiteLLM layer
- Independent lifecycle: Tear down/rebuild either container without affecting the other
- Resource limits: Prevent resource exhaustion attacks
- Data persistence: All sensitive data (credentials, SSH keys, configs) stored on host in
~/openclaw-docker/, not in ephemeral containers - Easy backup: Backup host directories, not container internals
Note: Whether using Docker or Podman, you run this setup ON your VPS (not your primary computer), and access it via Tailscale. The VPS provides the first layer of isolation, containers provide the second.
Step 21: Implement Credential Brokering (If Not Using Docker)
Note: If you deployed the Docker/Podman sandbox in Step 20, you already have credential brokering through LiteLLM. Skip this step.
Why (for non-Docker deployments): Agent never sees actual API keys; proxy injects them.
Conceptual approach:
# Run local proxy on port 8080 # Proxy receives requests, injects real API key, forwards to api.anthropic.com # OpenClaw configured to use localhost:8080 instead of direct API # In OpenClaw config, point to proxy apiEndpoint: "http://localhost:8080/v1/messages" # Don't store actual key in OpenClaw configImplementation requires nginx configuration or a custom proxy service. For most users, the Docker approach in Step 20 is simpler than setting up a standalone proxy.
Step 22: Separate Agents by Risk Profile
Why: Don’t mix high-privilege tools in one agent. Limit blast radius.
# Agent 1: File organization tools: filesystem: enabled shell: disabled network: disabled # Agent 2: Development tasks tools: filesystem: limited shell: allowlisted network: disabled credentials: none # Never have one agent with all privilegesStep 23: Enhanced Monitoring
Beyond Tier 2:
- Real-time network monitoring:
watch -n 5 'ss -tupn | grep OpenClaw' - Anomaly detection: Alert on unusual hours, API spikes, new domains contacted
- Credential access tracking: Log which credentials accessed when
- Tool invocation audit log (separate from session logs)
Step 24: Skill/MCP Source Code Review
Why: 26% of agent skills contain vulnerabilities (Cisco Talos).
Before installing ANY skill or MCP server:
# Download without installing npm pack @modelcontextprotocol/server-github@1.2.3 tar -xzf modelcontextprotocol-server-github-1.2.3.tgz # Read EVERY line of source code cat package/index.js cat package/lib/*.js # Search for red flags: grep -r "eval(" package/ grep -r "exec(" package/ grep -r "spawn(" package/ grep -r "http.request" package/ grep -r "fetch(" package/ grep -r "password\|api_key\|secret" package/ # Check package metadata npm view @modelcontextprotocol/server-github # Verify: publisher, downloads, recent updates # Run security audit cd package/ npm auditDon’t install if you find:
- Unexpected network calls
- Credential access beyond what’s documented
- Code obfuscation
- eval() or dynamic code execution
- New package with suspiciously high downloads
Step 25: Quarterly Credential Rotation
Beyond monthly maintenance:
# Every 3 months: # 1. Rotate ALL API keys # 2. Regenerate gateway auth tokens # 3. Revoke and re-authorize ALL OAuth sessions # 4. Rotate SSH keys # 5. Regenerate webhook tokens (Slack, Discord, etc.)Step 26: Encrypted Backups with Offline Verification
# Monthly encrypted backup BACKUP_DATE=$(date +%Y%m%d) tar -czf ~/backup-$BACKUP_DATE.tar.gz ~/.openclaw ~/clawd # Encrypt age --encrypt --armor \ --recipient $(cat ~/.age-key.txt | grep "public key" | cut -d: -f2) \ < ~/backup-$BACKUP_DATE.tar.gz \ > ~/backup-$BACKUP_DATE.tar.gz.age # Test restore capability age --decrypt --identity ~/.age-key.txt \ < ~/backup-$BACKUP_DATE.tar.gz.age \ > /tmp/test-restore.tar.gz tar -tzf /tmp/test-restore.tar.gz >/dev/null && \ echo "Backup verified" || echo "Backup corrupted!" rm /tmp/test-restore.tar.gz # Store encryption key separately from system # (e.g., on USB drive, password manager, separate machine)Step 27: Network Segmentation (Dedicated Hardware Only)
Why: Prevent lateral movement if OpenClaw is compromised.
If using repurposed hardware instead of VPS:
- Create guest network on router
- Connect OpenClaw machine to guest network only
- Guest network cannot access main network devices
- Or use VLAN if router supports it
Step 28: Document and Test Incident Response Plan
Why: During compromise, you won’t remember what to do.
Create ~/incident-response.md:
# OpenClaw Incident Response Plan ## Immediate Actions (Do First) 1. `openclaw stop` 2. `sudo ufw deny out to any` 3. `sudo ufw deny in from any` 4. Preserve evidence: `cp -r ~/.openclaw ~/incident-$(date +%Y%m%d)` ## Credential Revocation (Do Next) 1. Anthropic: https://console.anthropic.com/settings/keys (revoke ALL) 2. Gmail: https://myaccount.google.com/permissions (revoke ALL) 3. GitHub: https://github.com/settings/applications (revoke ALL) 4. Telegram: Revoke sessions in app 5. Change passwords (from different device) ## Investigation 1. Review session logs: `~/.openclaw/agents/*/sessions/*.jsonl` 2. Check for config changes: `diff gateway.yaml.backup gateway.yaml` 3. Search for injection: `grep -r "IGNORE PREVIOUS" sessions/` ## Recovery 1. Destroy VPS entirely (or wipe dedicated machine) 2. Rebuild from scratch following Tier 1-3 steps 3. Do NOT restore config from compromised system 4. Manually recreate settingsTest the plan quarterly (not during actual incident).
Step 29: Deploy Squid Proxy for Domain Allowlisting
Why: Network egress filtering prevents data exfiltration. Even if OpenClaw is compromised, it can only reach explicitly allowed domains. Step 20 blocks OpenClaw from the internet entirely; this step adds a filtering proxy so approved traffic can pass while everything else is denied.
Add this service to docker-compose.yml:
services: # ... existing litellm and openclaw services ... squid: image: ubuntu/squid:latest container_name: openclaw-squid restart: unless-stopped ports: - "127.0.0.1:3128:3128" # Expose locally for debugging volumes: - ./squid.conf:/etc/squid/squid.conf:ro - ./allowlist.txt:/etc/squid/allowlist.txt:ro networks: - OpenClaw-internal # Receives requests from OpenClaw - OpenClaw-external # Forwards to internetCreate squid.conf:
# Minimal Squid Config for OpenClaw Allowlisting http_port 3128 # ACL Definitions acl localnet src 172.16.0.0/12 # Docker/Podman networks acl localnet src 10.0.0.0/8 # Local LAN acl localnet src 192.168.0.0/16 # Local LAN acl SSL_ports port 443 acl Safe_ports port 80 # http acl Safe_ports port 21 # ftp acl Safe_ports port 443 # https acl Safe_ports port 1025-65535 # unregistered ports acl CONNECT method CONNECT # Access Control Lists http_access deny !Safe_ports http_access deny CONNECT !SSL_ports # Whitelist Configuration acl allowed_domains dstdomain "/etc/squid/allowlist.txt" # Rules http_access allow localhost http_access allow allowed_domains http_access deny all # Logging access_log stdio:/proc/self/fd/1 combinedCreate allowlist.txt:
# Core Dependencies .google.com .googleapis.com .github.com .githubusercontent.com .npmjs.org .yarnpkg.com registry.npmjs.org # Chat/Messaging Providers .telegram.org .t.me .slack.com .discord.com .discordapp.com .discord.gg .signal.org .whatsapp.com .whatsapp.net .facebook.com .matrix.org # Safe External Services (Add only what you explicitly need) .wikipedia.org .weatherapi.com # Add your custom domains below # .myapi.com # .mytrustedsite.orgDeny by default. Only add domains you explicitly trust and need.
Modify the OpenClaw service in docker-compose.yml to route traffic through Squid:
OpenClaw: # ... existing configuration ... environment: - NODE_ENV=production - ANTHROPIC_API_BASE=http://litellm:4000/v1 - ANTHROPIC_API_KEY=${LITELLM_MASTER_KEY} - HTTP_PROXY=http://squid:3128 # Route HTTP through Squid - HTTPS_PROXY=http://squid:3128 # Route HTTPS through Squid - NO_PROXY=litellm,127.0.0.1,localhost,172.16.0.0/12 # Bypass proxy for internalRestart and verify:
# Restart stack with Squid docker-compose down docker-compose up -d # Verify Squid is running docker ps | grep squid # Test allowed domain (should succeed) docker exec openclaw-agent sh -c "curl -I https://github.com" # Expected: HTTP 200 OK # Test blocked domain (should fail) docker exec openclaw-agent sh -c "curl -I https://malicious-site.xyz" # Expected: HTTP 403 Forbidden # View blocked requests docker logs openclaw-squid | grep TCP_DENIEDTo add a legitimate domain that’s being blocked:
# Add to allowlist echo ".example.com" >> allowlist.txt # Reload Squid (no restart needed) docker exec openclaw-squid squid -k reconfigureStep 30: Configure Granular Exec Approvals
Why: Goes beyond basic tool allowlisting with per-agent, per-command policies and approval workflows.
Create ~/.openclaw/exec-approvals.json (or in Docker: ~/openclaw-docker/openclaw-data/exec-approvals.json):
{ "version": 1, "defaults": { "security": "allowlist", "ask": "on-miss", "askFallback": "deny", "autoAllowSkills": false }, "agents": { "dev": { "security": "allowlist", "ask": "off", "allowlist": [ { "pattern": "/usr/bin/ls" }, { "pattern": "/bin/ls" }, { "pattern": "/usr/bin/cat" }, { "pattern": "/bin/cat" }, { "pattern": "/usr/bin/grep" }, { "pattern": "/bin/grep" }, { "pattern": "/usr/bin/head" }, { "pattern": "/usr/bin/tail" }, { "pattern": "/usr/bin/find" }, { "pattern": "/usr/bin/wc" }, { "pattern": "/usr/bin/sort" } ] }, "files": { "security": "deny", "ask": "always" }, "research": { "security": "allowlist", "ask": "on-miss", "allowlist": [ { "pattern": "/usr/bin/curl" }, { "pattern": "/usr/bin/wget" }, { "pattern": "/usr/bin/jq" } ] } } }Configuration options: security: "allowlist" means only explicitly allowed commands run. security: "deny" blocks all commands by default. ask: "off" trusts the allowlist without prompting. ask: "on-miss" prompts if a command isn’t in the allowlist. ask: "always" prompts for every command. askFallback: "deny" means unanswered prompts default to denial. autoAllowSkills controls whether ClawdHub skills are auto-trusted.
Create agents with different profiles:
# Agent 1: Development (read-only, no shell) openclaw create agent dev \ --exec-approval-profile dev \ --no-shell \ --filesystem-readonly # Agent 2: File management (requires approval for everything) openclaw create agent files \ --exec-approval-profile files \ --shell-allowlist "" # Empty allowlist = deny all # Agent 3: Research (network access via proxy) openclaw create agent research \ --exec-approval-profile research \ --proxy http://squid:3128Test the policies:
# Test with 'dev' agent openclaw chat --agent dev > Run: ls /tmp # Allowed (in allowlist) > Run: rm -rf /tmp/test # Denied (not in allowlist, ask=off) # Test with 'files' agent openclaw chat --agent files > Run: ls /tmp # Approval required. Allow? (y/N):Step 31: Deploy via Ansible (Optional Alternative)
Why: Automate the entire Tier 1 + Tier 2 + Tier 3 deployment in 15-30 minutes instead of 7-9 hours of manual configuration.
Install Ansible on your control machine (laptop/desktop):
# Ubuntu/Debian sudo apt install ansible # macOS brew install ansible # Arch Linux sudo pacman -S ansible # Verify version (2.10 or higher) ansible --versionRun the playbook:
git clone https://github.com/Next-Kick/openclaw-hardened-ansible.git cd openclaw-hardened-ansible chmod +x deploy.sh update-allowlist.sh # Interactive deployment ./deploy.sh # Non-interactive deployment ./deploy.sh \ --target 10.0.5.100 \ --ssh-user root \ --provider ollama \ --model llama3 \ --url http://10.0.110.1:11434 \ --non-interactive # Using Anthropic ./deploy.sh \ --target 10.0.5.100 \ --provider anthropic \ --model claude-3-5-sonnet-20240620 \ --key sk-ant-api03-xxxxx \ --non-interactiveThe playbook detects OS (Arch/Debian/Ubuntu), updates the system, installs Podman and Tailscale, creates the openclaw user with generated SSH key, configures UFW, generates a unique hostname (e.g., “dolphin-carpet-thunder”), deploys three Podman containers (OpenClaw, LiteLLM, Squid) with the gateway bound to localhost only, and configures monitoring with systemd timers.
After deployment:
# Connect to the host ssh -i ssh-keys/dolphin-carpet-thunder.pem openclaw@10.0.5.100 # Access the dashboard via Tailscale # http://100.x.x.x:18789 # Or via SSH tunnel # ssh -i ssh-keys/dolphin-carpet-thunder.pem -L 18789:127.0.0.1:18789 openclaw@10.0.5.100 # Then open http://localhost:18789To update the domain allowlist without full redeployment:
# Edit the allowlist template vim roles/tier3-setup/templates/allowlist.txt.j2 # Push update ./update-allowlist.sh --target 10.0.5.100Secrets (LITELLM_MASTER_KEY, OPENCLAW_GATEWAY_TOKEN) are preserved across redeployments. See the playbook README for complete documentation.
Step 32: Establish Allowlist Update Process
Why: Domain allowlists require ongoing maintenance. New services and integrations need to be added safely.
Document your policy. Every allowed domain should have a reason. Blocked categories should include financial services, email providers (except dedicated burner Gmail), cloud storage, social media, e-commerce, and unknown/untrusted domains.
Before adding a new domain:
# 1. Temporarily add domain to allowlist echo ".newapi.com # Testing - added $(date)" >> ~/openclaw-docker/allowlist.txt # 2. Reload Squid (no restart needed) docker exec openclaw-squid squid -k reconfigure # 3. Test from openclaw container docker exec openclaw-agent curl -I https://newapi.com # 4. Monitor logs for unexpected behavior docker logs -f openclaw-squid & docker logs -f openclaw-agent & # 5. If suspicious activity, remove immediately sed -i '/newapi.com/d' ~/openclaw-docker/allowlist.txt docker exec openclaw-squid squid -k reconfigureRun a monthly allowlist audit:
# View current allowlist cat ~/openclaw-docker/allowlist.txt # Check which domains were actually accessed docker logs openclaw-squid --since 30d | \ grep TCP_MISS | \ awk '{print $7}' | \ sort | uniq -c | sort -rn # Review denied requests (verify these are legitimately blocked) docker logs openclaw-squid --since 30d | grep TCP_DENIED | tail -50Remove domains not accessed in 90 days. Maintain a changelog in ~/openclaw-docker/ALLOWLIST_CHANGELOG.md noting every addition and removal with dates and reasons.
Create ~/validate-allowlist.sh to catch common mistakes:
#!/bin/bash # Validate allowlist.txt for common issues ALLOWLIST=~/openclaw-docker/allowlist.txt echo "=== Allowlist Validation ===" # Check for duplicates echo "[*] Checking for duplicates..." sort "$ALLOWLIST" | uniq -d # Check for invalid patterns echo "[*] Checking for invalid patterns..." grep -v '^#' "$ALLOWLIST" | grep -v '^\s*$' | while read domain; do if [[ ! "$domain" =~ ^\. ]]; then echo "WARNING: Domain missing leading dot: $domain" fi done # Check for overly broad wildcards echo "[*] Checking for dangerous wildcards..." grep -E '^\.\w+$' "$ALLOWLIST" # e.g., .com, .org (too broad) # Count total allowed domains echo "[*] Total allowed domains:" grep -v '^#' "$ALLOWLIST" | grep -v '^\s*$' | wc -l echo "=== Validation Complete ==="chmod +x ~/validate-allowlist.sh ~/validate-allowlist.sh✓ Tier 3 Complete. You now have maximum defense-in-depth for OpenClaw.
Network Architecture (Tier 3)
┌──────────────────────────────────────────────┐ │ Access Methods │ │ Tailscale VPN ✅ Encrypted │ │ SSH Tunnel ✅ Encrypted │ └──────────────────────┬───────────────────────┘ │ HTTP (Port 18789) │ Bound to 127.0.0.1 only ↓ ┌──────────────────────────────────────────────────────────┐ │ OpenClaw Container │ │ (openclaw-internal network) │ │ ❌ NO External Internet │ │ Firewall Layer 1 │ └─────────┬────────────────────────────┬───────────────────┘ │ │ │ API Requests │ HTTP/HTTPS Egress ↓ ↓ ┌─────────────────────────┐ ┌─────────────────────────────┐ │ LiteLLM Container │ │ Squid Proxy (Step 29) │ │ (Step 20) │ │ (openclaw-external) │ │ (openclaw-external) │ │ │ │ │ │ Allowlist Enforcement: │ │ Credential Brokering: │ │ ✅ .github.com │ │ - Injects real API key │ │ ✅ .npmjs.org │ │ - Rate limiting │ │ ✅ .telegram.org │ │ - Cost controls │ │ ✅ .wikipedia.org │ │ ✅ Internet Access │ │ ❌ Everything else │ │ │ │ │ │ api.anthropic.com │ │ Firewall Layer 2 │ │ api.openai.com │ └─────────────────────────────┘ └─────────────────────────┘ │ │ │ └──────────────┬─────────────────┘ ↓ Internet Defense layers:
- Loopback binding + Tailscale/SSH tunnel - Gateway never exposed to public internet
- Network segmentation (Step 20) - Internal network isolation
- Squid domain allowlist (Step 29) - Egress filtering, only approved domains
- LiteLLM credential brokering (Step 20) - API key isolation, rate limiting
Emergency Response Procedures
Red Flags (Shut Down Immediately)
- Port 18789 suddenly on
0.0.0.0instead of127.0.0.1 dangerouslyDisableDeviceAuth: trueappeared in gateway.yaml- Commands you didn’t issue in session logs
- New MCP servers you didn’t install
- Modified SOUL.md/MEMORY.md you didn’t edit
- Credential files modified outside maintenance windows
- Unknown IPs in
ss -tupnoutput - API usage spikes on provider dashboards
- Squid logs showing blocked domains suddenly allowed
- Unusual domains in Squid TCP_MISS logs
Immediate Containment
# Stop all services openclaw stop # or: podman-compose down # Block all network traffic sudo ufw deny out to any sudo ufw deny in from any # Stop containers (if using Docker/Podman) cd ~/openclaw-docker docker-compose down # or: podman-compose down # Preserve evidence INCIDENT_DATE=$(date +%Y%m%d-%H%M%S) mkdir ~/openclaw-incident-$INCIDENT_DATE cp -r ~/.openclaw ~/openclaw-incident-$INCIDENT_DATE/ cp -r ~/openclaw-docker ~/openclaw-incident-$INCIDENT_DATE/ # Capture logs journalctl -u OpenClaw-gateway --since "2 weeks ago" \ > ~/openclaw-incident-$INCIDENT_DATE/gateway-logs.txt ss -tupn > ~/openclaw-incident-$INCIDENT_DATE/connections.txt # Docker/Podman logs docker logs openclaw-agent > ~/openclaw-incident-$INCIDENT_DATE/openclaw.log docker logs openclaw-squid > ~/openclaw-incident-$INCIDENT_DATE/squid.logCredential Rotation (Assume All Compromised)
- Revoke API keys: https://console.anthropic.com/settings/keys
- Revoke OAuth: Gmail, GitHub, Telegram (ALL sessions)
- Reset passwords (from different device)
- Regenerate gateway token:
openssl rand -base64 32 - Rotate SSH keys
- Regenerate webhooks
- Rotate LiteLLM master key
- Review Squid logs for data exfiltration attempts
Recovery
Recommended: Destroy VPS, rebuild from scratch using Ansible playbook.
Not recommended: Attempt to clean compromised system.
# Nuclear option (complete rebuild) # 1. Snapshot incident data # 2. Destroy VPS # 3. Provision new VPS # 4. Redeploy using Ansible git clone https://github.com/Next-Kick/openclaw-hardened-ansible.git cd openclaw-hardened-ansible ./deploy.sh --target NEW_IP --provider ollama --model llama3Cost-Benefit Analysis
Monthly costs:
- VPS: $4-20
- API usage: $10-30 (Anthropic/OpenAI) or $0 (Ollama self-hosted)
- Total: $4-50/month
Time investment:
- Manual deployment: Tier 1 setup takes 3-4 hours, Tier 2 adds 2 hours, Tier 3 adds 2-3 hours. Monthly maintenance is 60 minutes. Annual total is roughly 18-22 hours.
- Ansible deployment: Initial deployment takes 30 minutes. Monthly maintenance is 60 minutes. Annual total is roughly 12-15 hours.
What you get:
- 24/7 AI assistant via messaging
- Automation for non-sensitive tasks
- Learning experience with Linux, security, AI tooling
- Production-grade security architecture
- Network egress filtering
What you’re still risking:
- Prompt injection (unfixable)
- Supply chain attacks
- Unknown vulnerabilities
OpenClaw makes sense if:
- You enjoy tinkering with technology
- You have non-sensitive use cases
- You won’t connect accounts on NEVER list
- 12-22 hours/year feels reasonable
- You want to learn security hardening
Skip OpenClaw if:
- You want “set and forget” (use Claude.ai instead)
- Security concerns cause anxiety
- Your time is worth >$50/hour
- You’d be tempted to connect work accounts
What Hardening Doesn’t Protect Against
Unfixable vulnerabilities:
- Prompt injection from any content the bot processes
- Zero-day vulnerabilities in OpenClaw core
- Compromised model provider APIs
- Social engineering attacks
- Advanced persistent threats
Mitigated but not eliminated:
- Supply chain attacks (you can review code, but can you catch everything?)
- Configuration drift (monthly audits help, but gaps exist between audits)
- Credential exposure (encryption helps, but keys must decrypt somewhere)
- Domain allowlist bypass (attacker might use approved domains maliciously)
- Container escape (Podman limits impact, but doesn’t eliminate risk)
Expert Dissent
Heather Adkins, VP Security, Google Cloud: “Don’t run Clawdbot.”
Jamieson O’Reilly, Dvuln: “AI agents tear down decades of security boundaries by design. The value proposition requires punching holes through every boundary we spent decades building.”
Palo Alto Networks: “OpenClaw is not designed for enterprise use” and the attack surface is “unmanageable and unpredictable.”
Cisco Talos: 26% of 31,000 agent skills contained vulnerabilities. “The skill ecosystem is the Wild West.”
The security community hasn’t reached consensus on whether hobbyists should run agentic AI tools. This guide provides the steps to minimize risk, but whether you should run it at all remains your judgment call.
The defaults ship insecure. Nobody hardens your deployment except you. Follow these tiers. Fix what’s broken. Run audits monthly.
Or use the Ansible playbook and let automation handle the heavy lifting. Either way, stay vigilant.
Peace. Stay curious! End of transmission
A guest post by
|